Place your unit on a flat surface. It is recommended to use two people to move the AMOS units around.
Releasing Motion
You will find zip ties on each belt system (one on each Z axis and one on each X and Y belt path). Remove these while being cautious not to cut the belt itself.
Using the power cord provided with your unit, plug the unit into a power source.
Prior to powering on, if you plan to use Ethernet for connectivity, plug in a standard Ethernet cord into the back of the unit at this time.
Power on your unit by flipping the switch at the power cord on the back of your unit.
If your unit does not turn on, check the troubleshooting section or contact us at cateam@chicagoadd.com
If your unit is not on, please power it on and wait for it to fully boot. The screen on the front of your unit will look similar to this once fully booted.
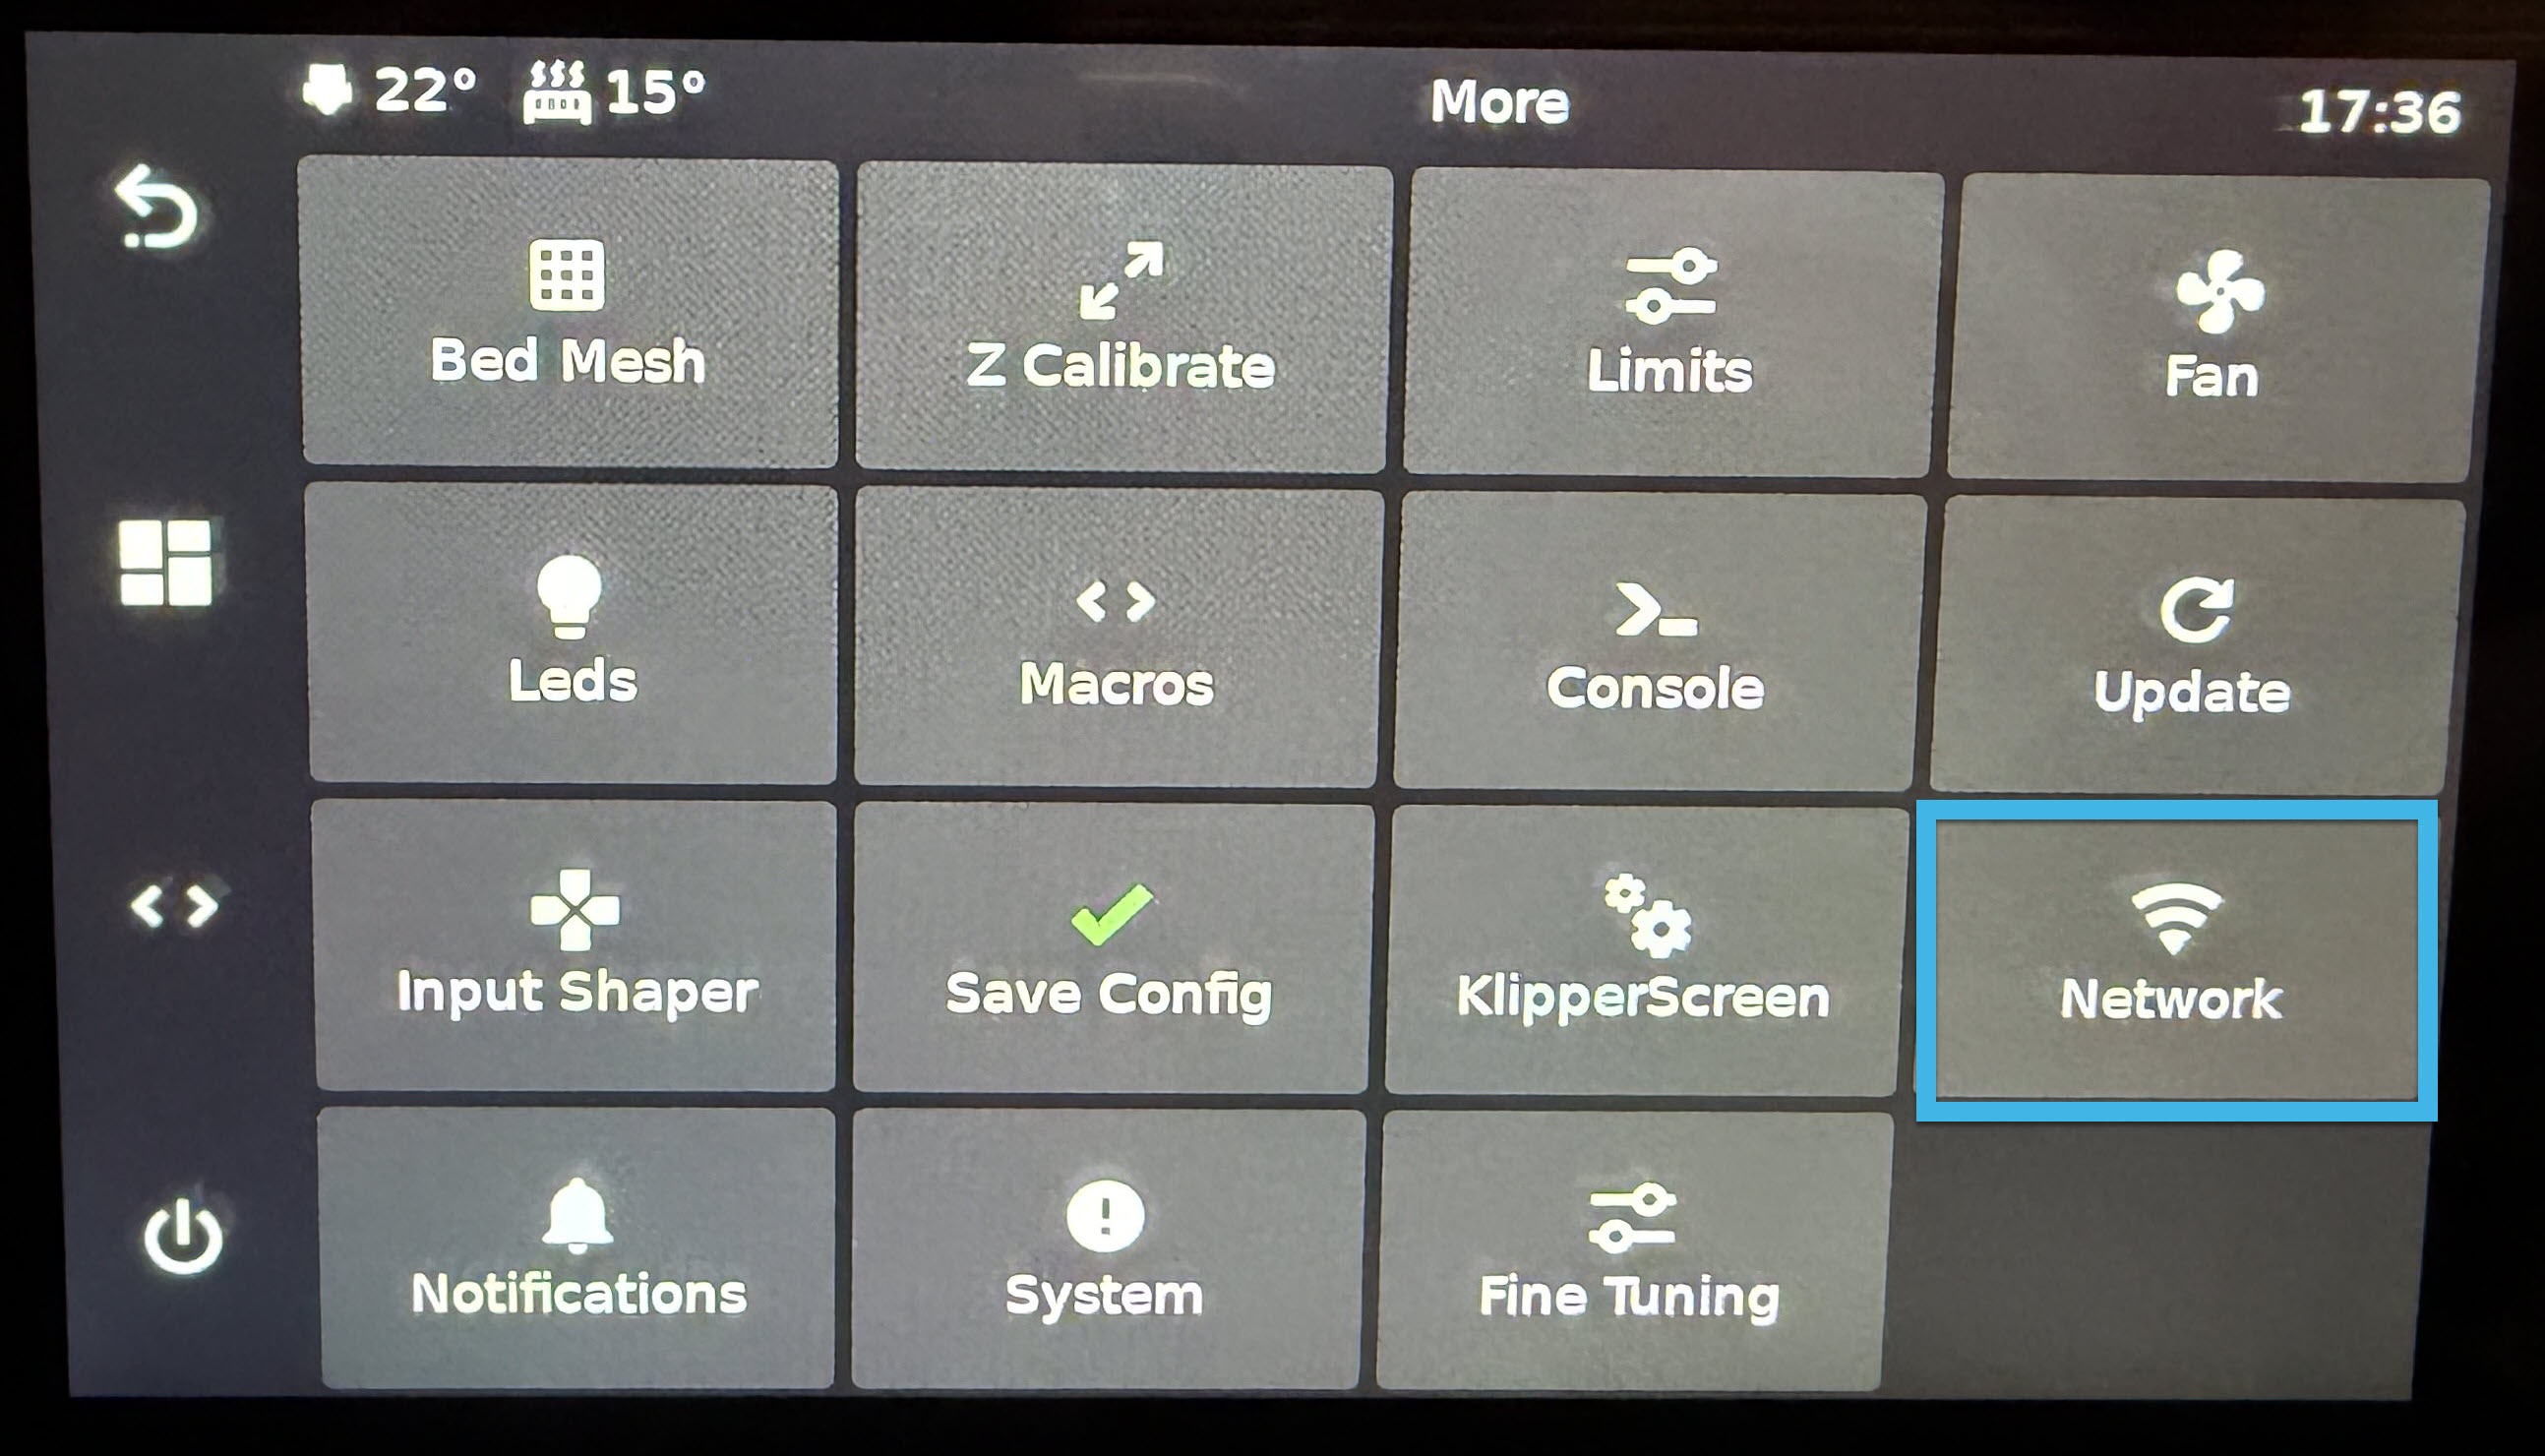
¶ Once this screen above is present, select the More button
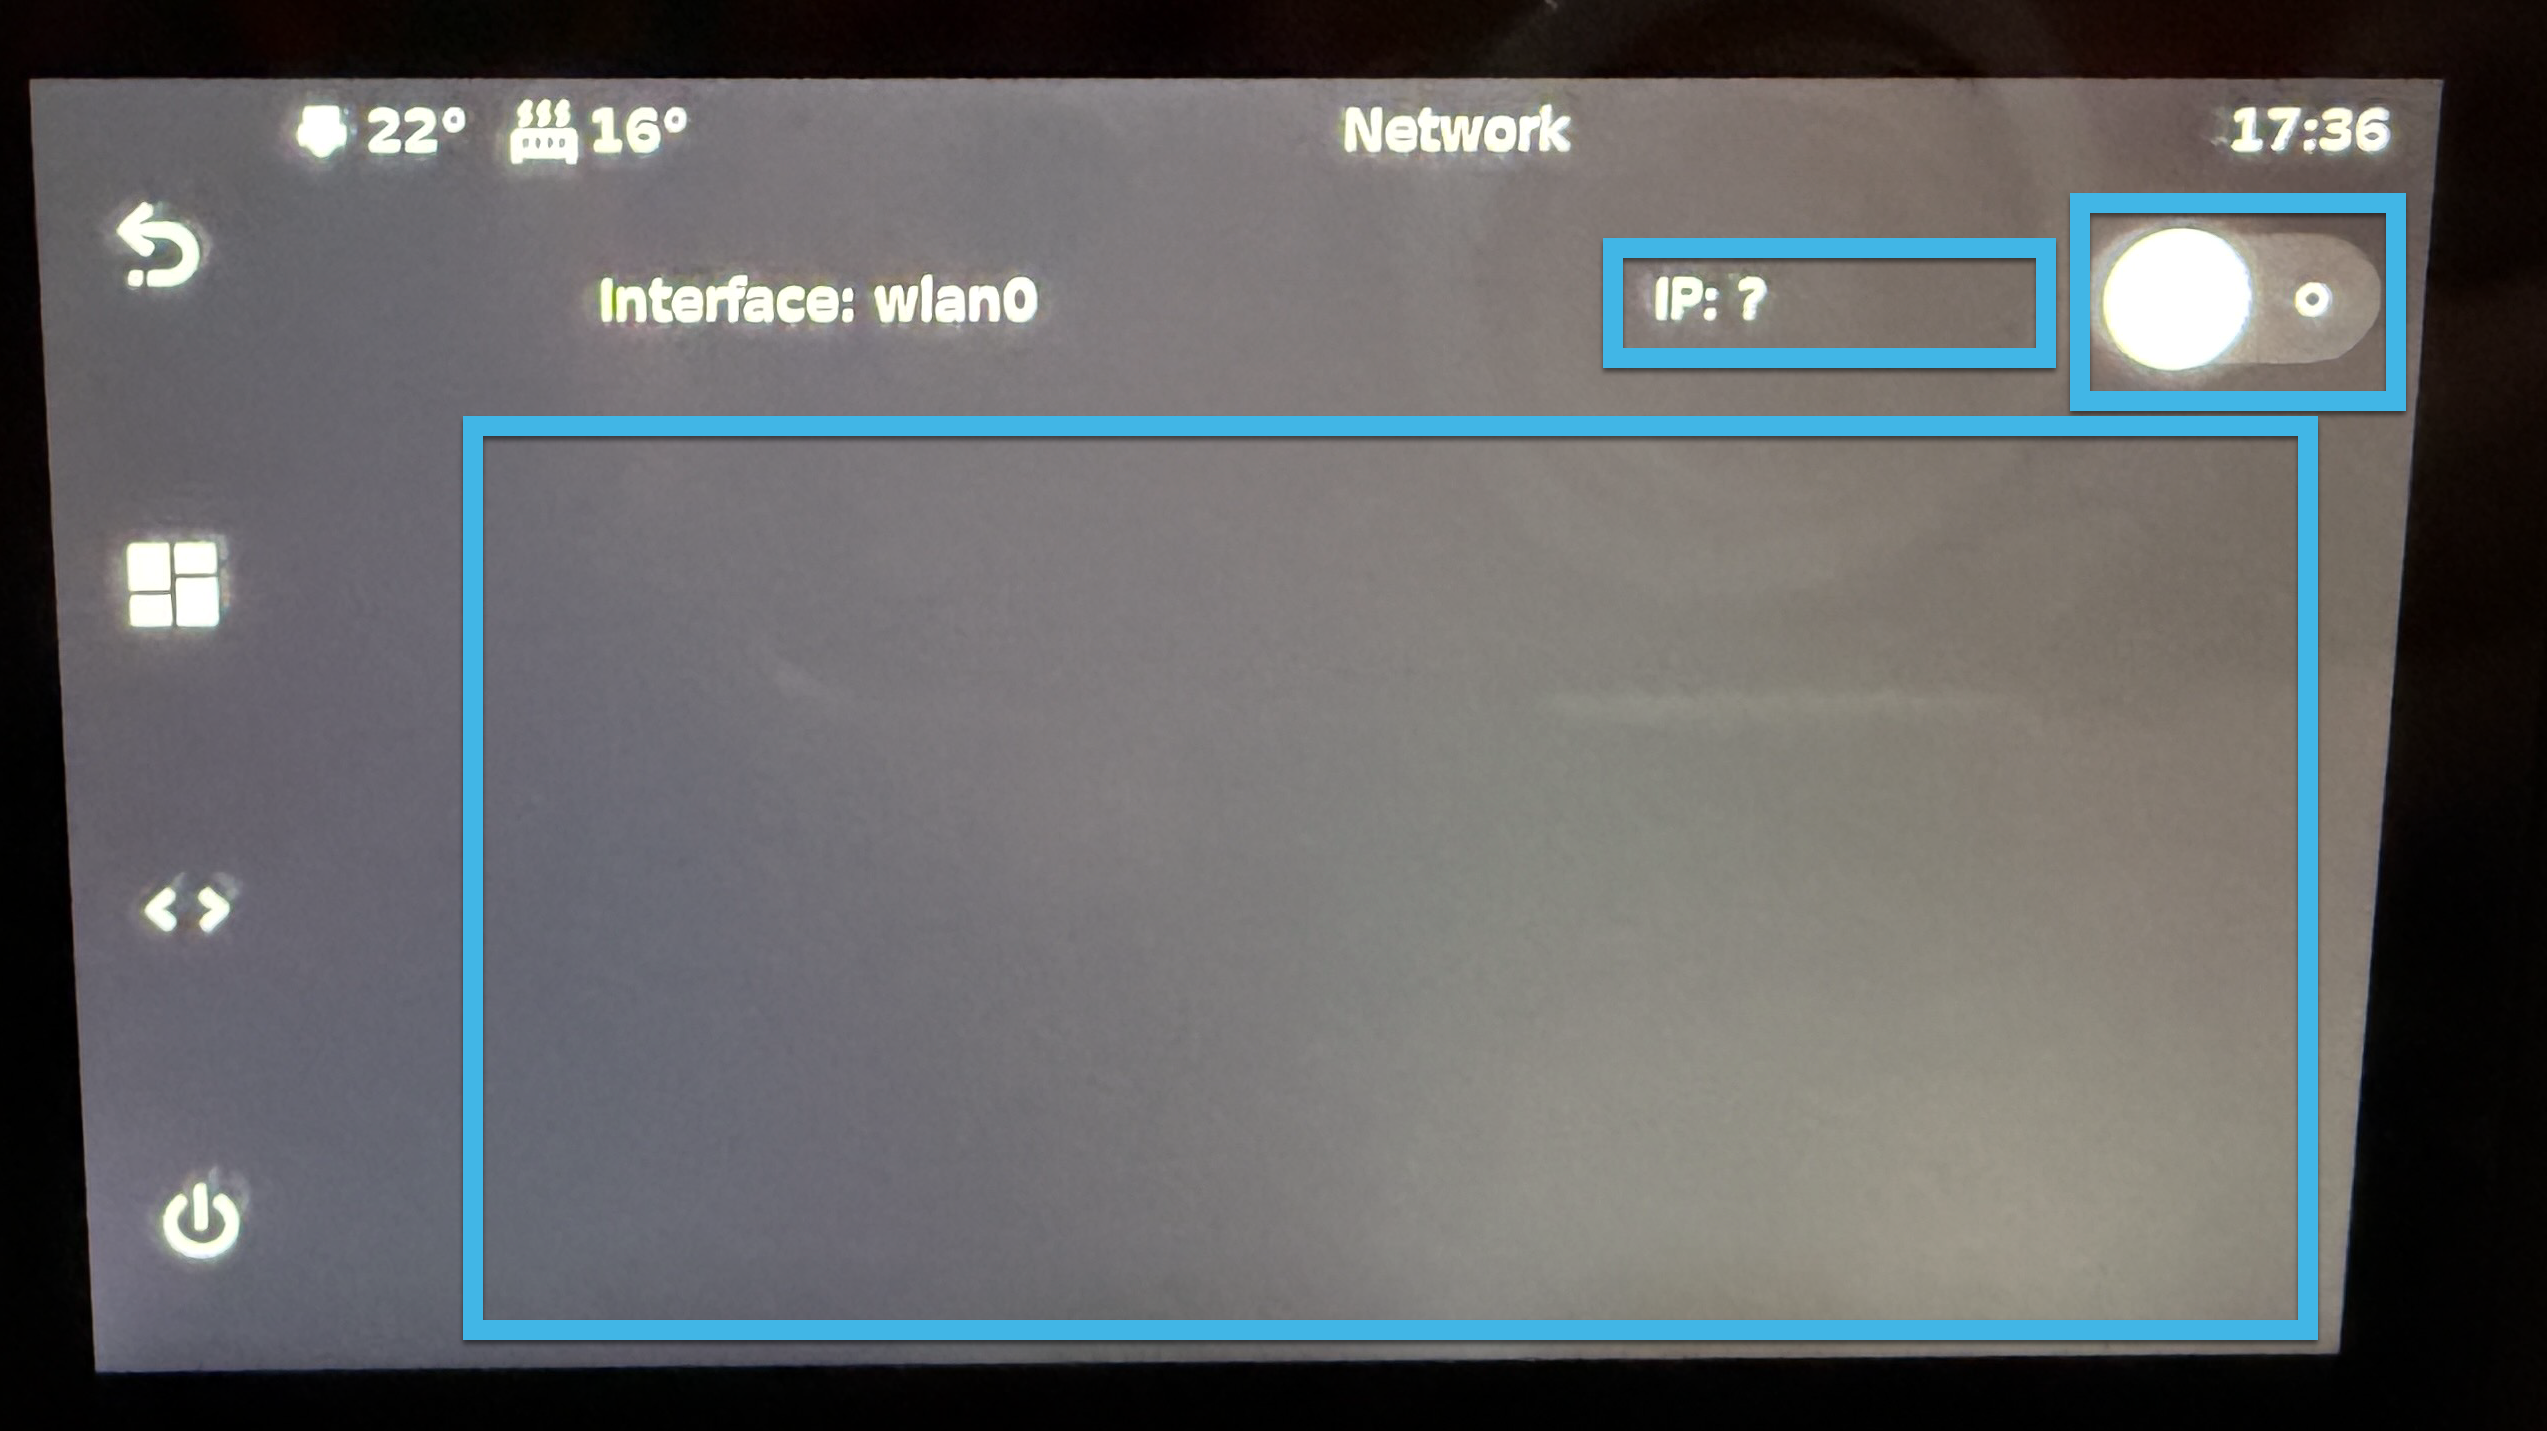
¶ Under the networks screen, there will be 3 main areas you will interact.
In the top left corner, under the time, you will find the switch which will turn your network on and off. Ensure that it is on and to the right.
To the left of the switch, you will find the IP address. This will list the IP it is currently connected to. If you are attempting to access the web interface, this IP address is one way to get to it. You will also need this to connect your slicer, such as the Orca Slicer, to your unit.
In the center of the screen, you will find a list of WiFi networks available to connect to.
¶ Once you have the IP address you will now be able to access your web interface by using your browser and inserting you IP address or by inputing http://amos(your AMOS unit number).local. For example http://amos1.local